Create a new activity.
How to create a new activity?
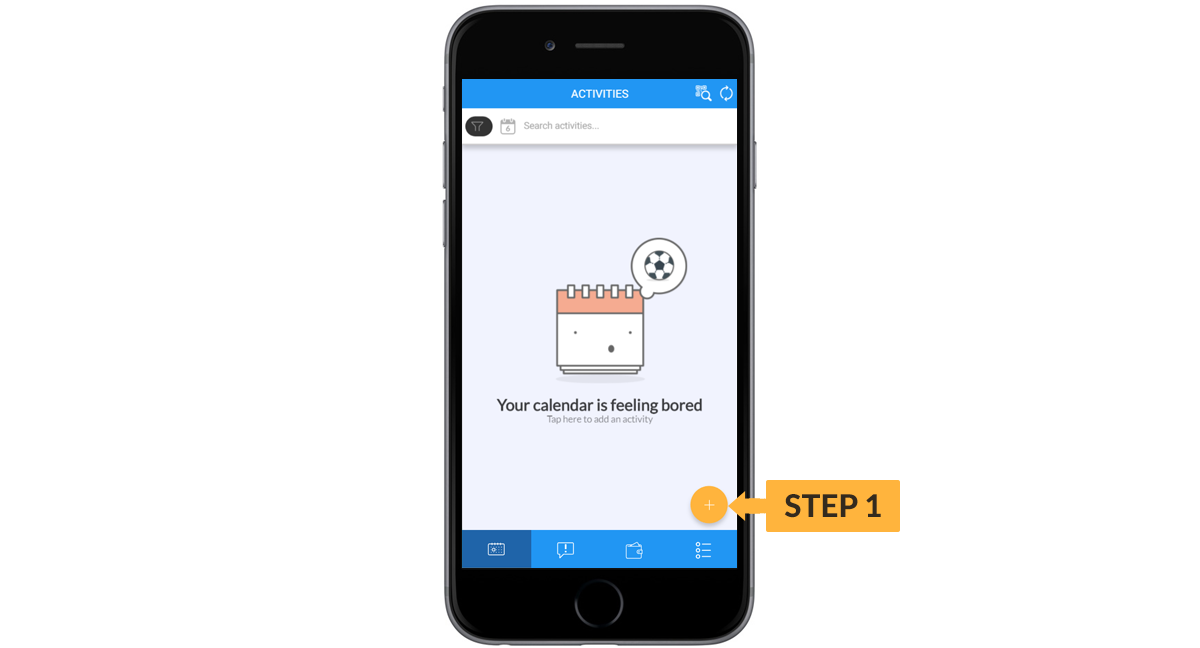
- Go to activity listing page and tap on the add button located at the bottom of the page.
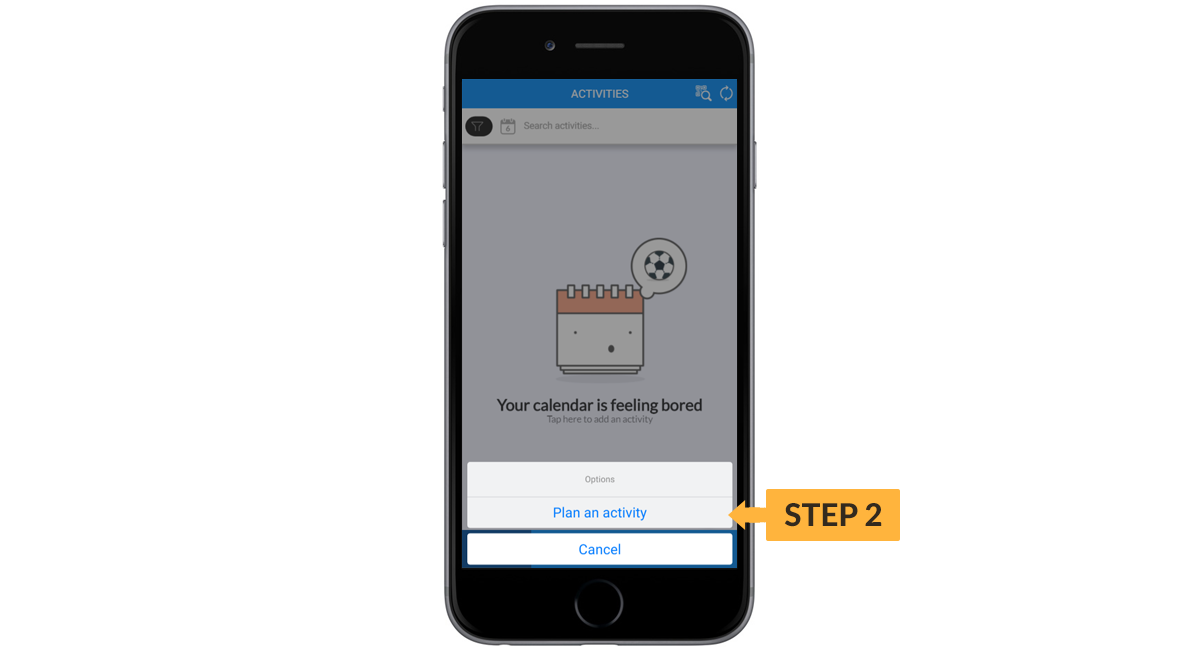
- Select plan an activity from the pop up box.
- Fill up the activity details accordingly.
- Tap on show all button for more information if necessary.
- Tap on submit button to create a new activity.

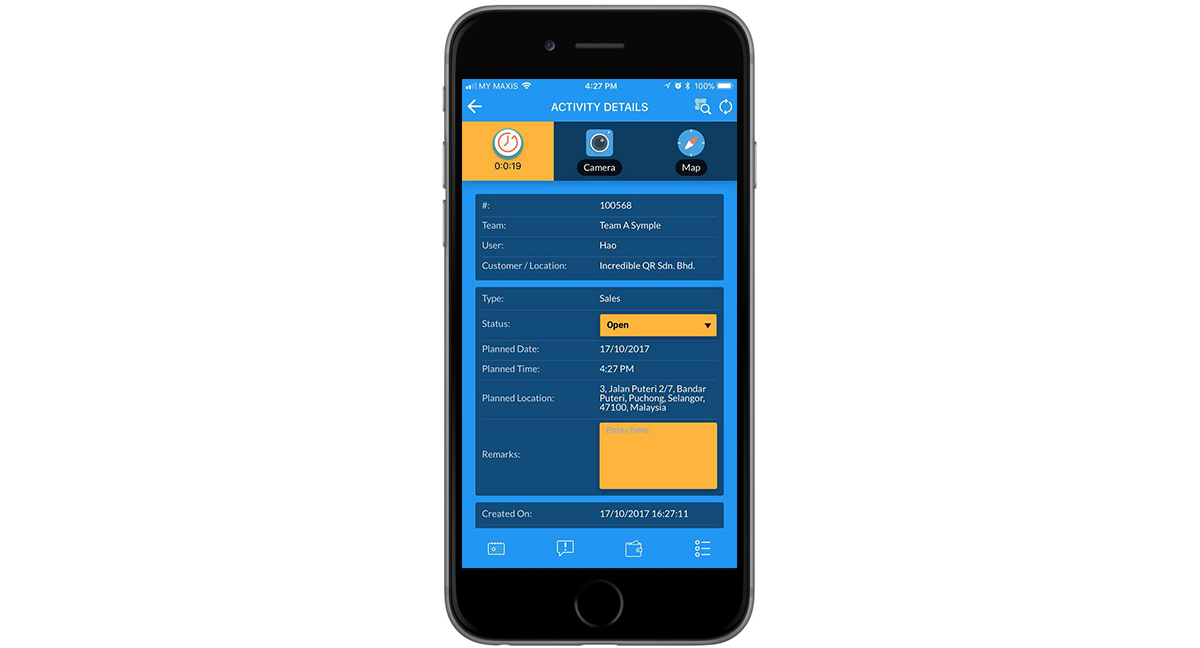
Updating activity
Our activity module allow user to capture the details they require. Details such as:
Check-in location
How to check in to a location?
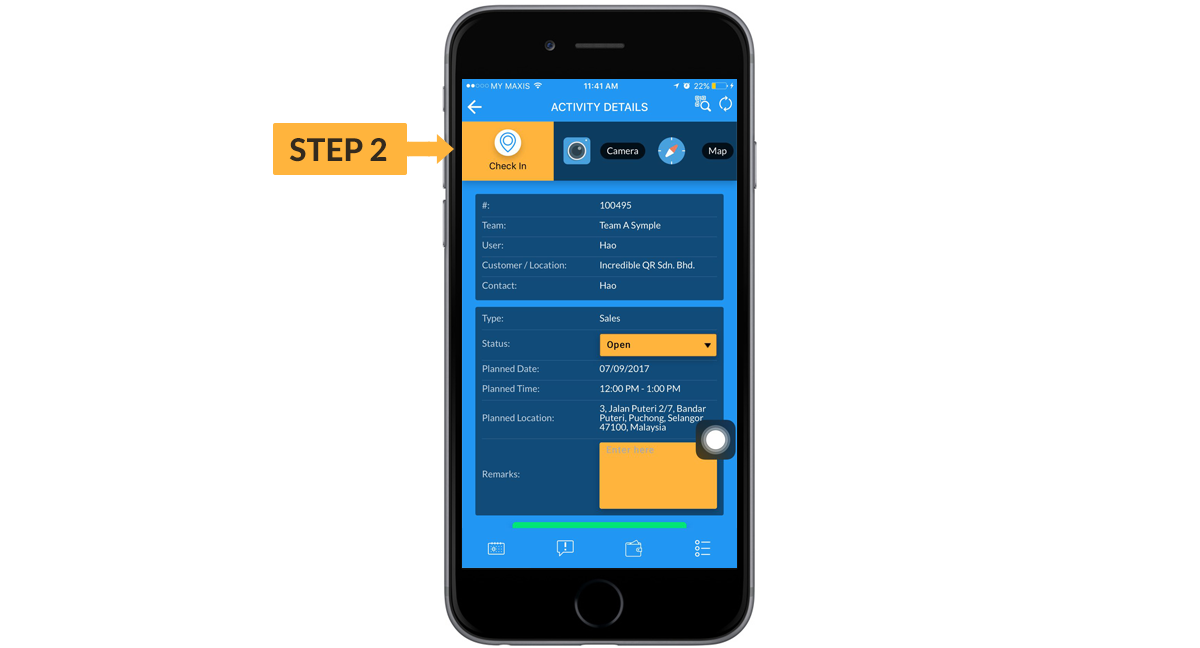
- Go to activity listing page and tap on the activity accordingly.

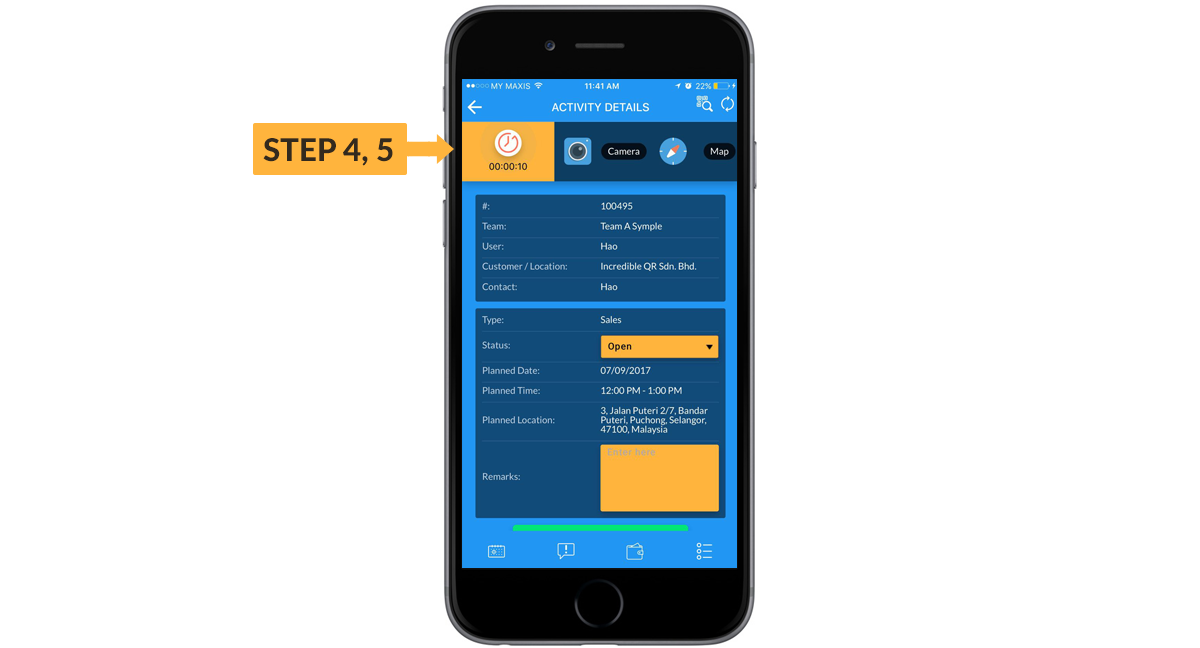
- Tap on check-in button located on top of the activity detail page. (Do make sure that GPS is turned on from the phone settings)
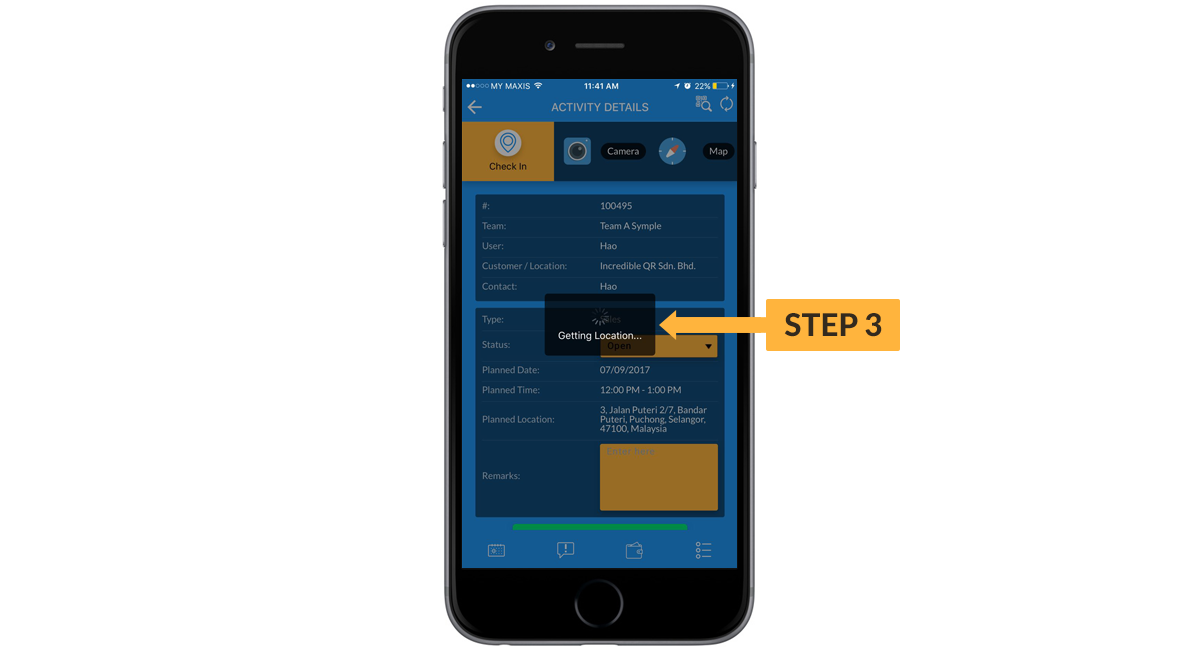
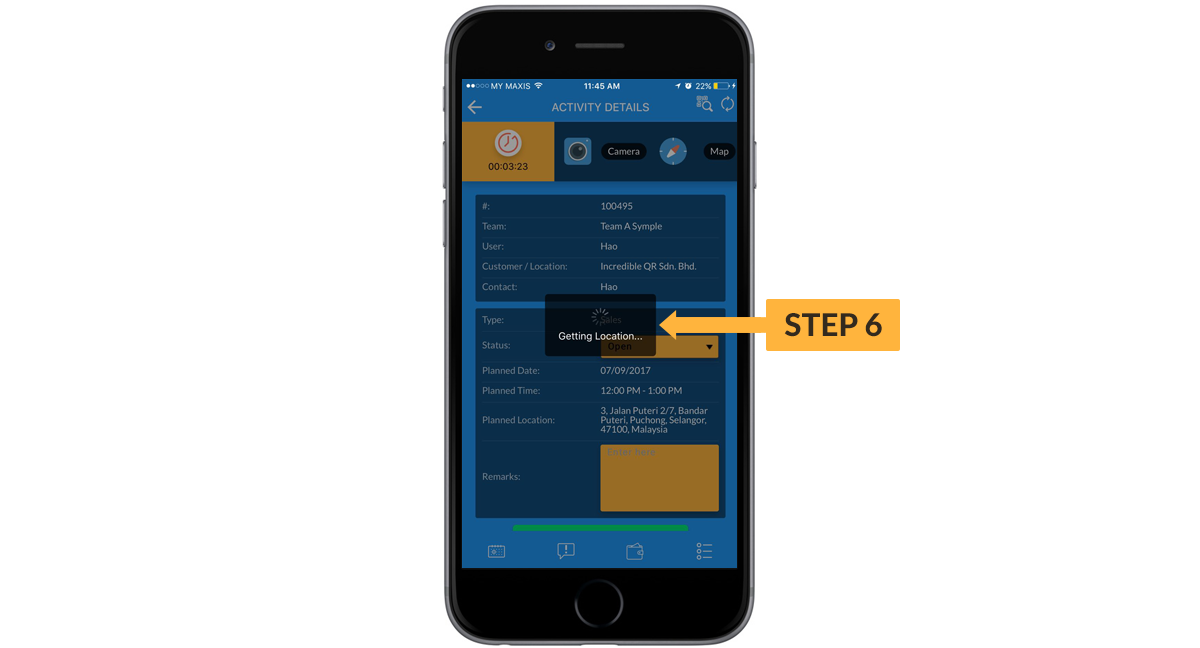
- Loading screen will appear while system are capturing your current location for the activity as the check-in location.
- Timer is showing the duration of the activity from the check-in time.
- Tap on check-out button located on top of the activity detail page. (Do make sure that GPS is turned on from the phone settings)
- Loading screen will appear while system are capturing your current location for the activity as the check-out location.
- Done icon will appear on top of the activity detail page when user is check-out from the activity successfully. Date and time will be captured and displayed below the done icon.

Capture photo
How to capture a photo?
- Go to activity listing page and tap on the activity accordingly.
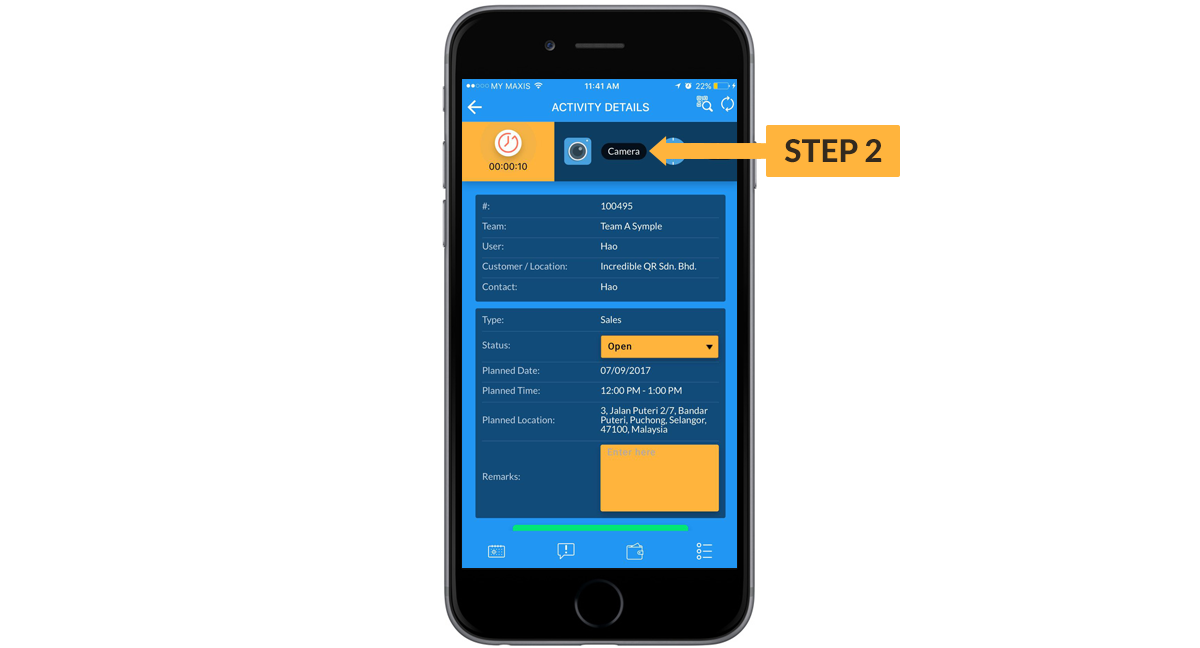
- Tap on camera button located on top of the activity detail page. (Do make sure that Symple app have permission to access the phone camera from the settings)
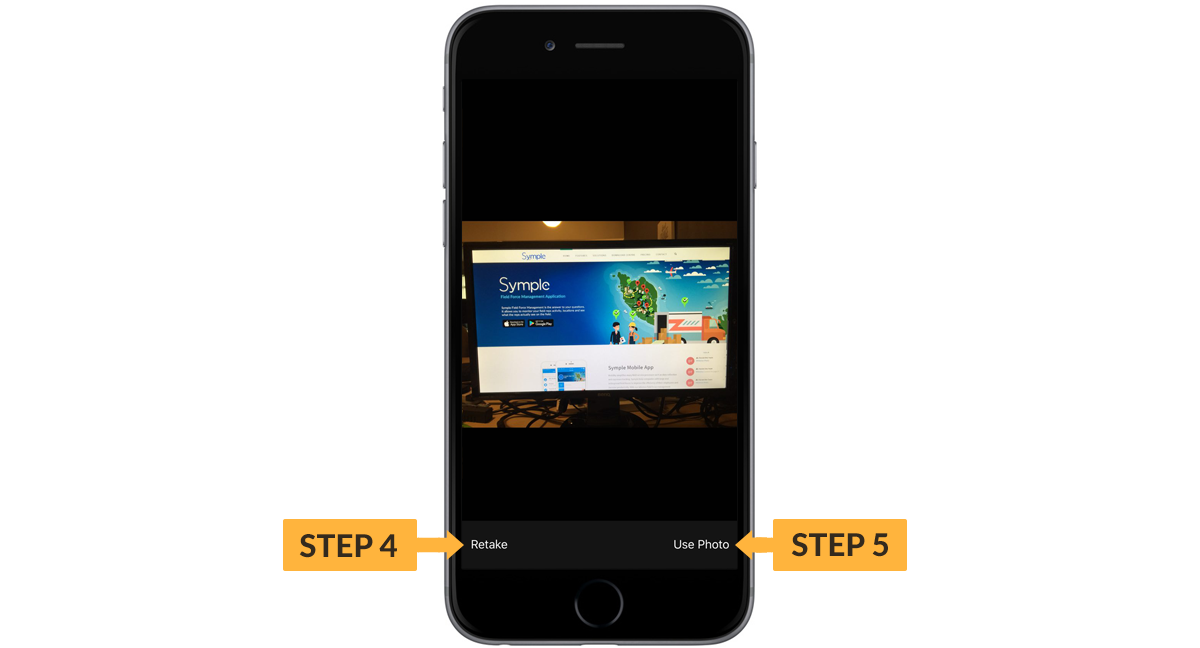
- Take a photo of the activity.
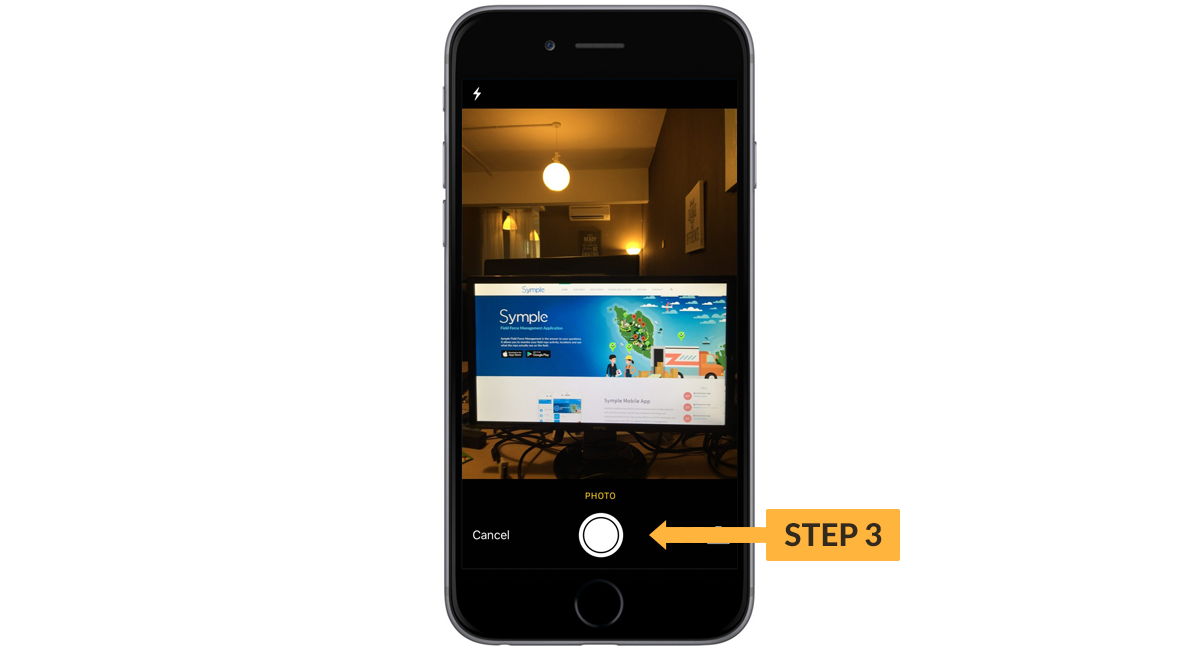
- Tap on Retake to retake a photo.
- Tap on Use Photo to save the photo.
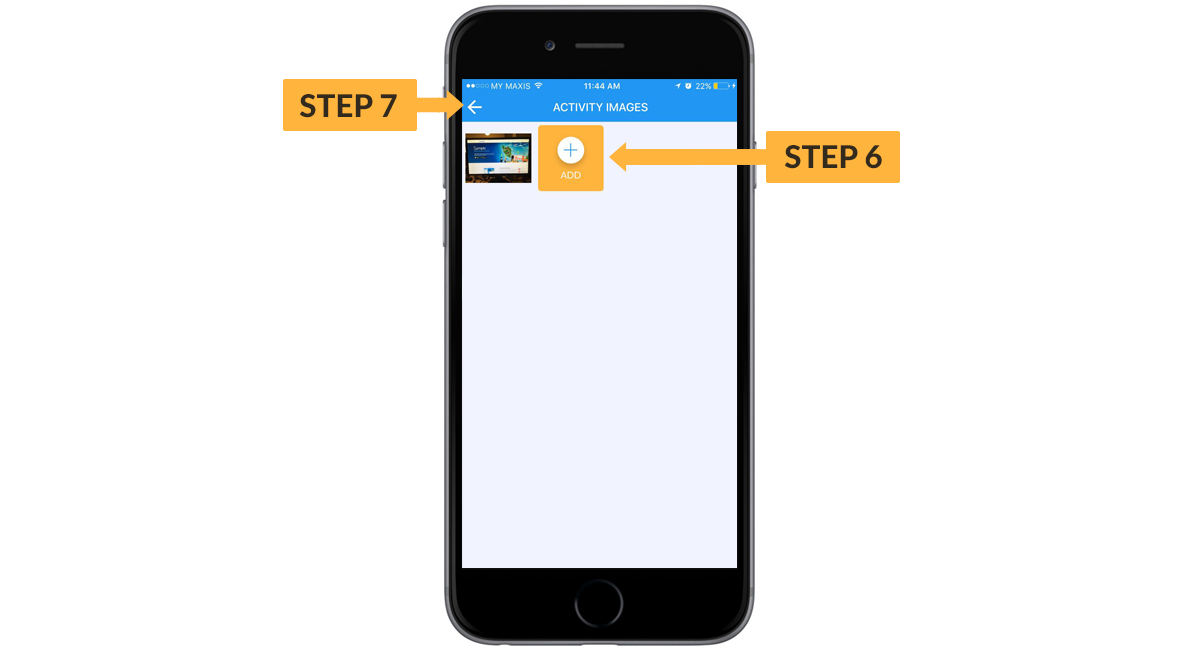
- Tap on add button to add more photo for the activity.
- Tap on back button to get back to activity detail page.
Open map for direction
How to get to activity when you don’t have any idea on the direction?
- Go to activity listing page and tap on the activity accordingly.
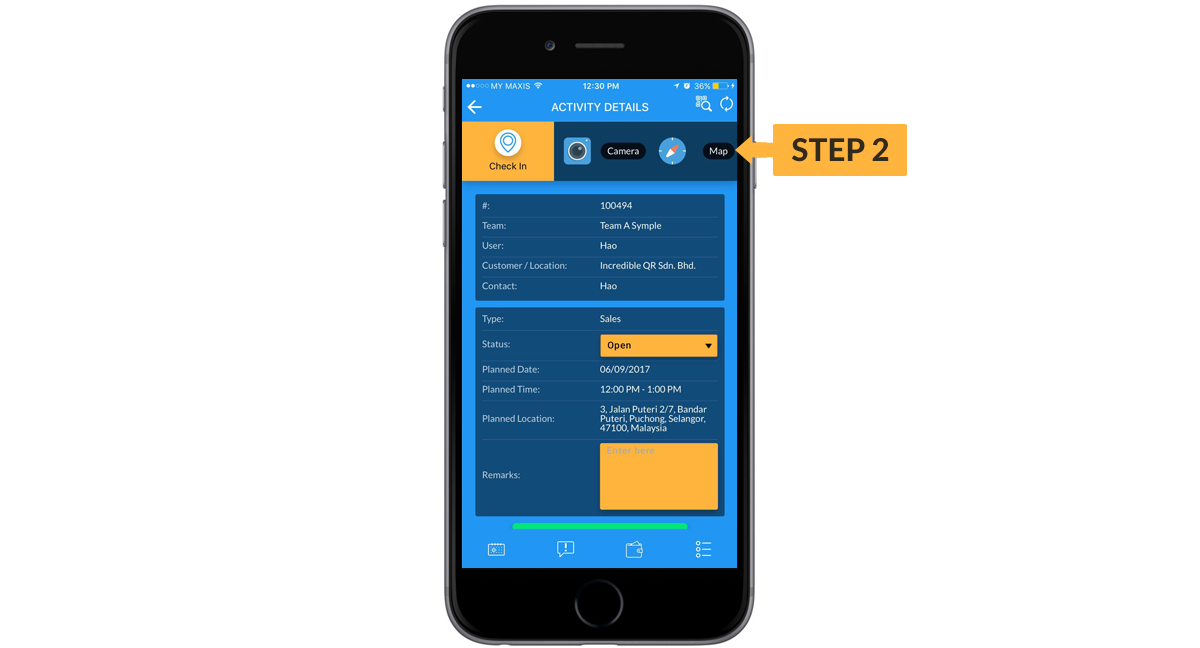
- Tap on map button located on top of the activity detail page.
- Select your preferred way to get to the activity location.
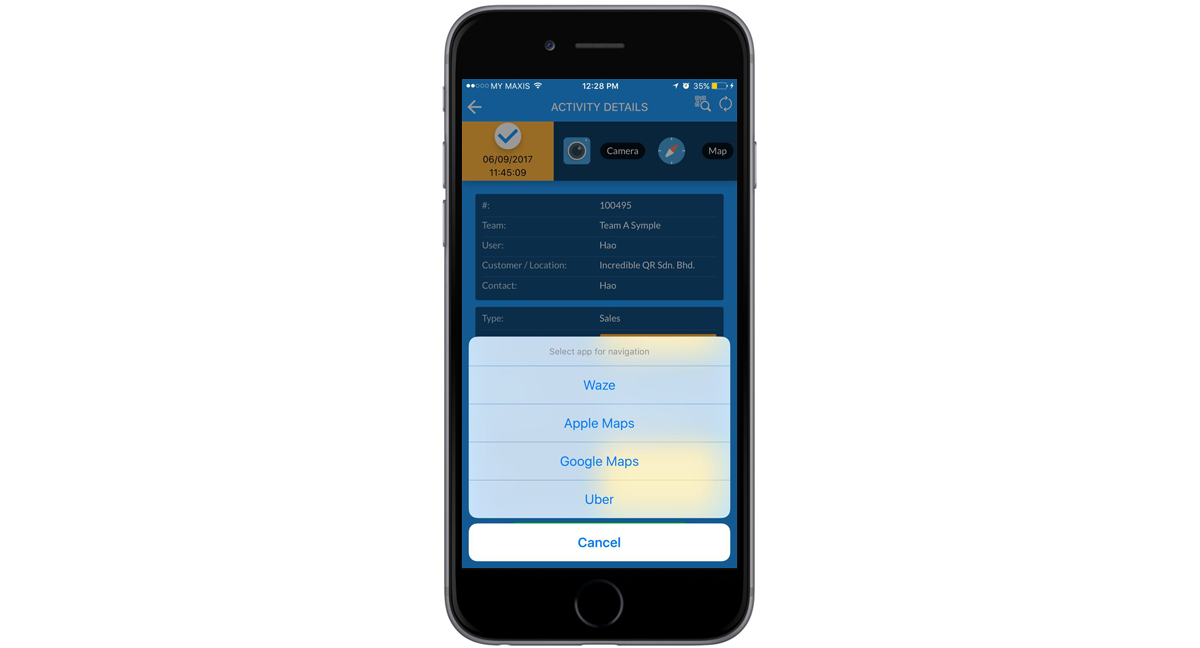
- Symple app will open the third party app accordingly based on the selection.
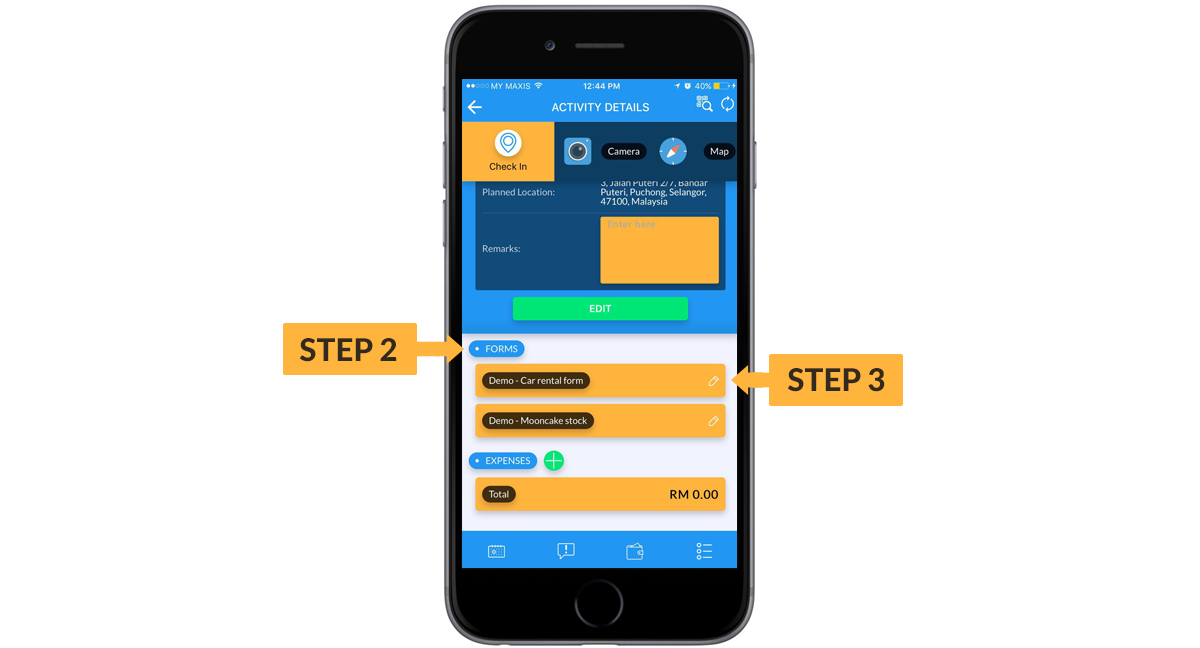
Filling up data capture forms
How to fill up data capture forms?
- Go to activity listing page and tap on the activity accordingly.
- Available data capture forms will appear on the form section.
- Tap on the data capture forms accordingly.
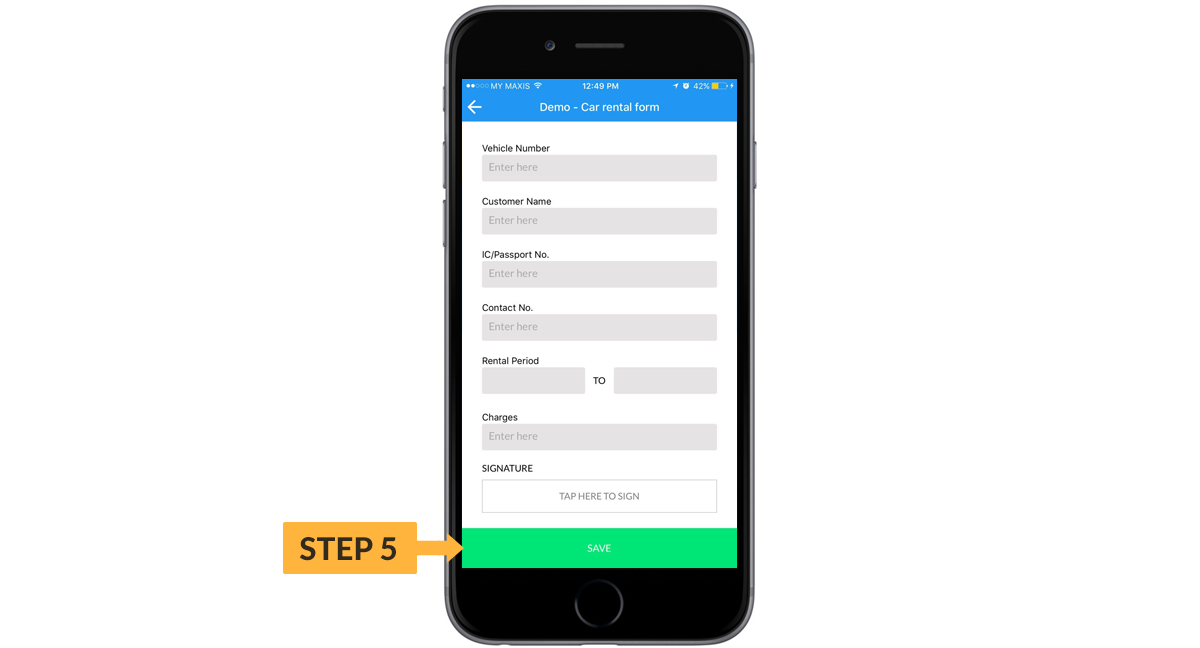
- Fill up the data capture forms accordingly.
- Tap on save button to save the data capture forms
Adding expenses
Symple app allow user to capture and submit expenses claim easily. Type of expenses are:
Mileage
How to capture and submit mileage claim?
- Go to activity listing page and tap on the activity accordingly.
- Tap on the add button located beside the expenses section.
- Select expenses type “Mileage”.
- Enter the total amount of the parking.
- Start Location is default to the last check in location.
- Tap on the map icon located at the end of
- Tap on submit button to submit the claim.
Parking
How to capture and submit parking claim?
- Go to activity listing page and tap on the activity accordingly.
- Tap on the add button located beside the expenses section.
- Select expenses type “Parking”.
- Enter the total amount of the parking.
- tap on the add button located below the Receipt to add a receipt.
- Tap on submit button to submit the claim.
Toll
How to capture and submit toll claim?
- Go to activity listing page and tap on the activity accordingly.
- Tap on the add button located beside the expenses section.
- Select expenses type “Toll”.
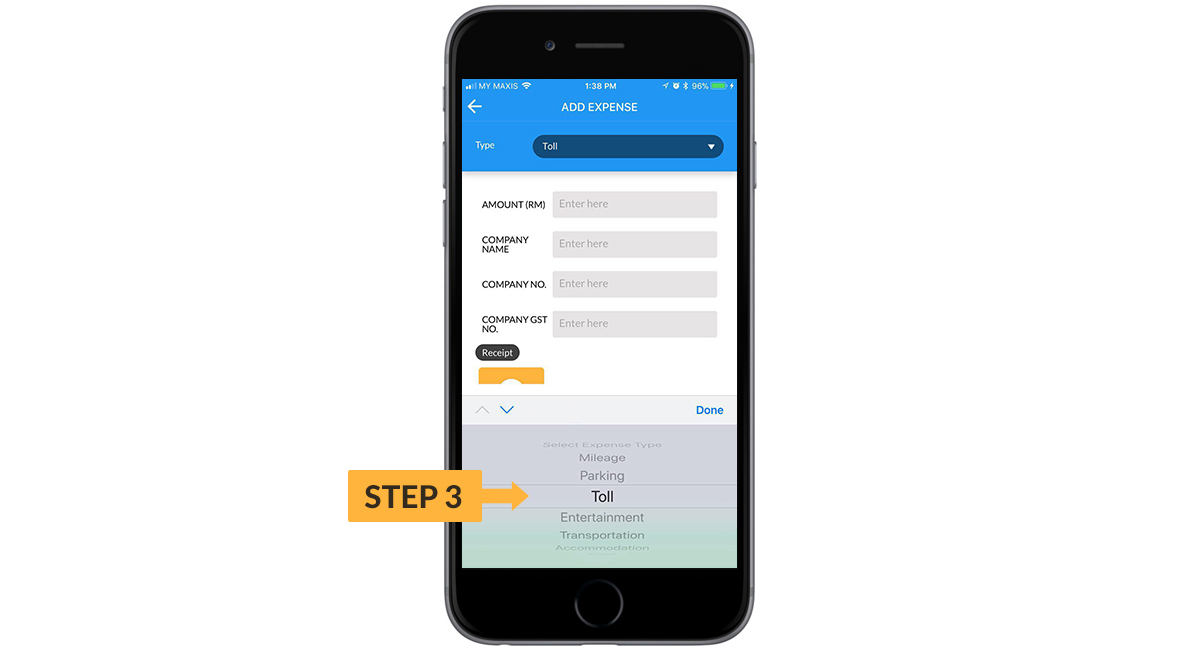
- Fill up the form accordingly.
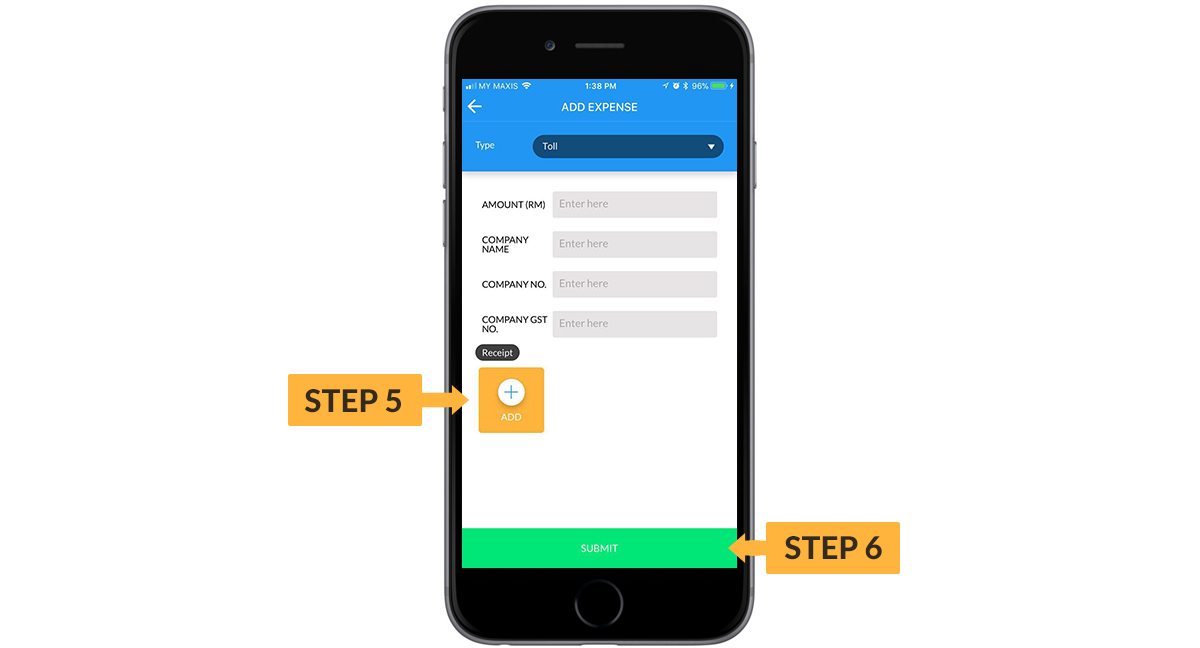
- Tap on the add button located below the Receipt to add a receipt.
- Tap on submit button to submit the claim.
Entertainment
How to capture and submit entertainment claim?
- Go to activity listing page and tap on the activity accordingly.
- Tap on the add button located beside the expenses section.
- Select expenses type “Entertainment”.

- Fill up the form accordingly.
- Tap on the add button located below the Receipt to add a receipt.
- Tap on submit button to submit the claim.

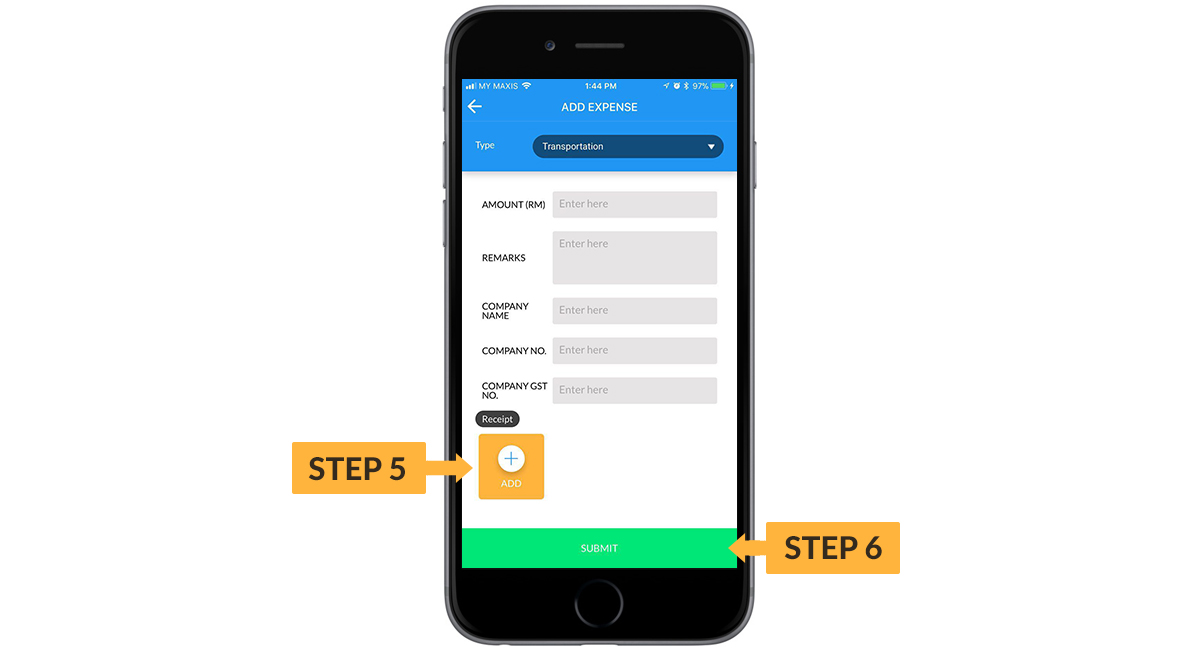
Transportation
How to capture and submit entertainment claim?
- Go to activity listing page and tap on the activity accordingly.
- Tap on the add button located beside the expenses section.
- Select expenses type “Transportation”.

- Fill up the form accordingly.
- Tap on the add button located below the Receipt to add a receipt.
- Tap on submit button to submit the claim.
Accommodation
How to capture and submit entertainment claim?
- Go to activity listing page and tap on the activity accordingly.
- Tap on the add button located beside the expenses section.
- Select expenses type “Accommodation”.

- Fill up the form accordingly.
- Tap on the add button located below the Receipt to add a receipt.
- Tap on submit button to submit the claim.

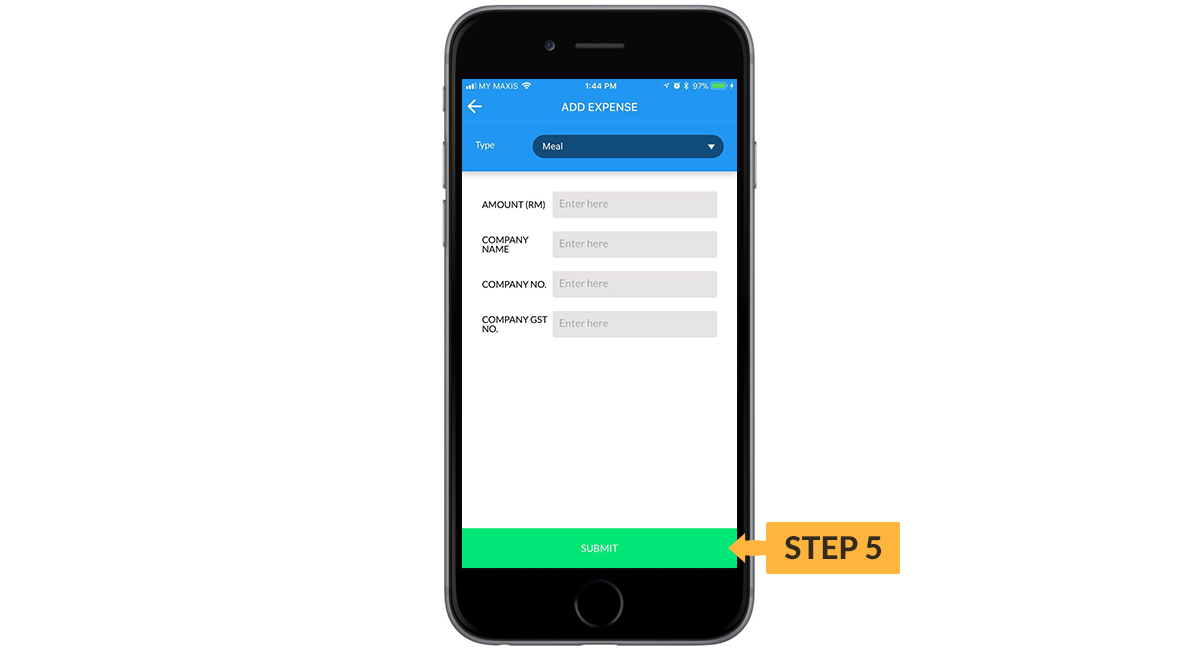
Meal
How to capture and submit entertainment claim?
- Go to activity listing page and tap on the activity accordingly.
- Tap on the add button located beside the expenses section.
- Select expenses type “Meal”.

- Fill up the form accordingly.
- Tap on submit button to submit the claim.
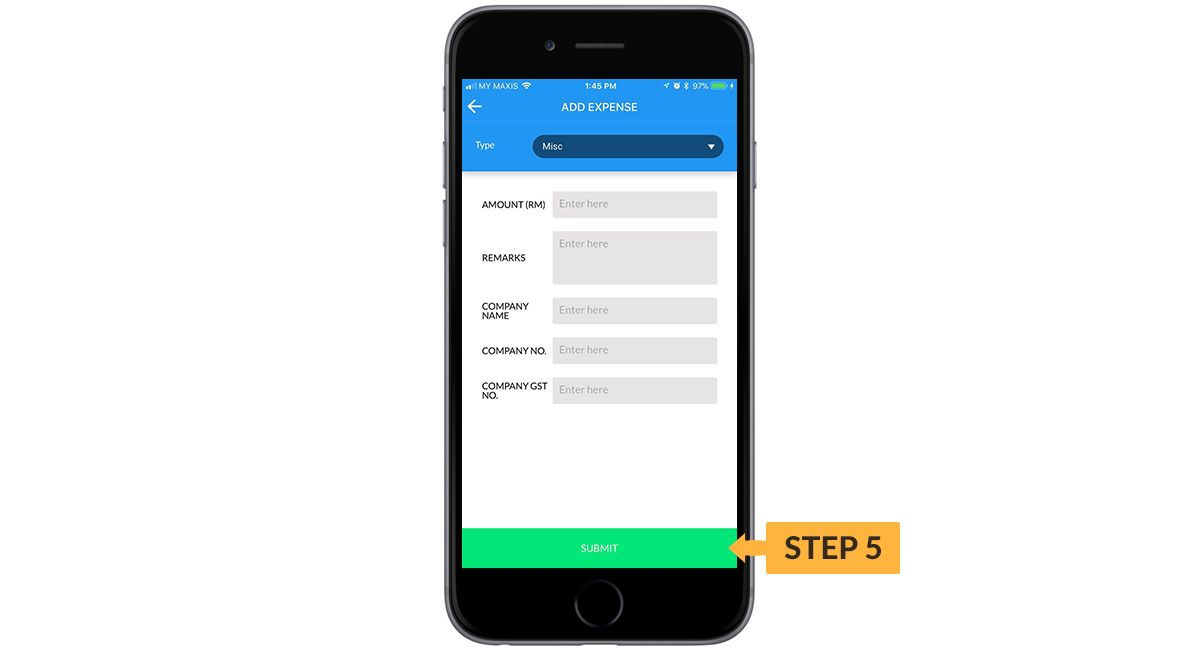
Misc
How to capture and submit entertainment claim?
- Go to activity listing page and tap on the activity accordingly.
- Tap on the add button located beside the expenses section.
- Select expenses type “Misc”.
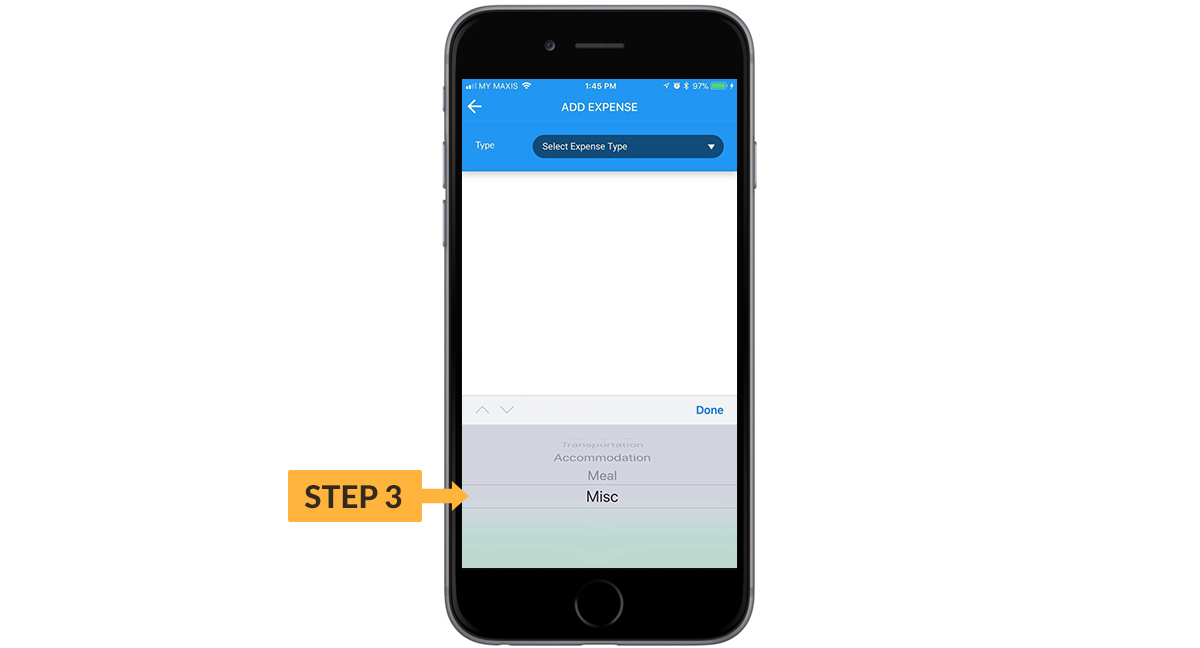
- Fill up the form accordingly.
- Tap on submit button to submit the claim.
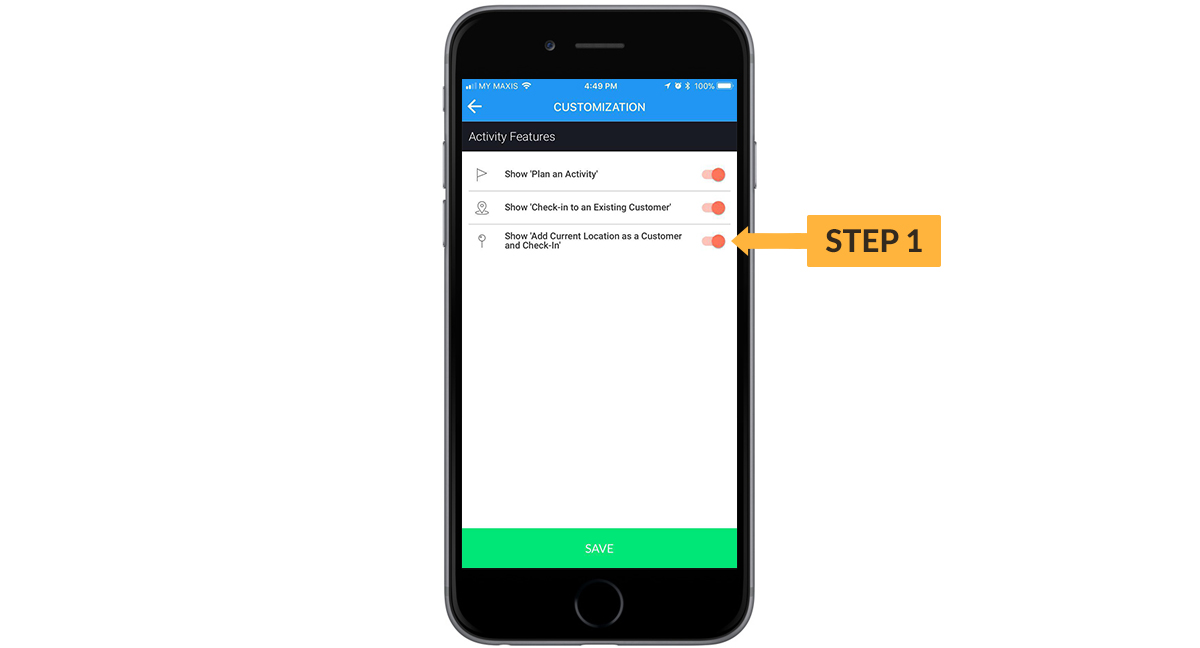
Quick Check-in
Quick check-in to existing customer/location
How to perform quick check-in to existing customer/location?
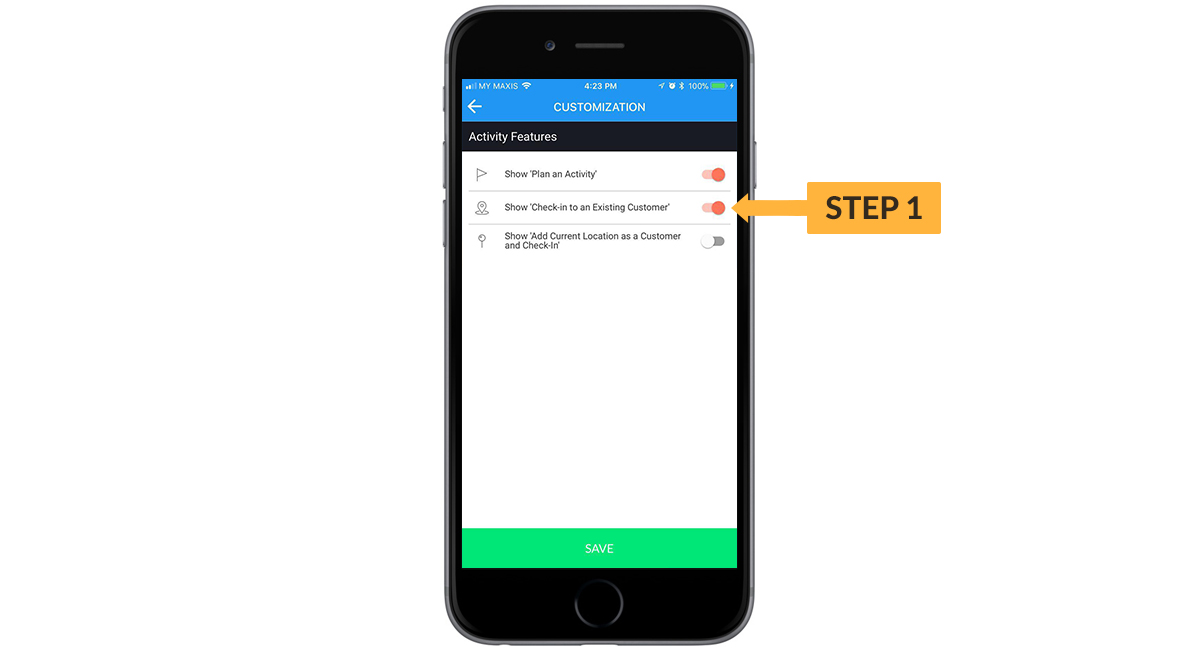
- Make sure ‘Show Check-in to an Existing Customer’ features is enable.
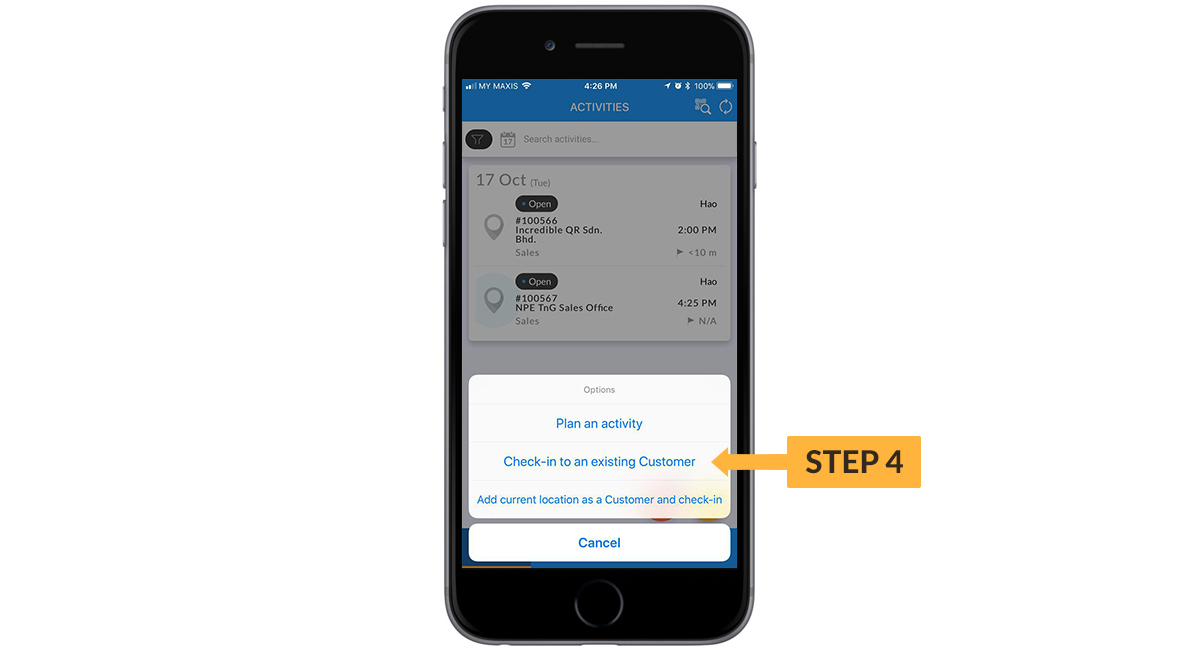
- Go to Activity page.
- Tap on Add Button located at the bottom of the page.

- Select “Check-in to an existing Customer” option.
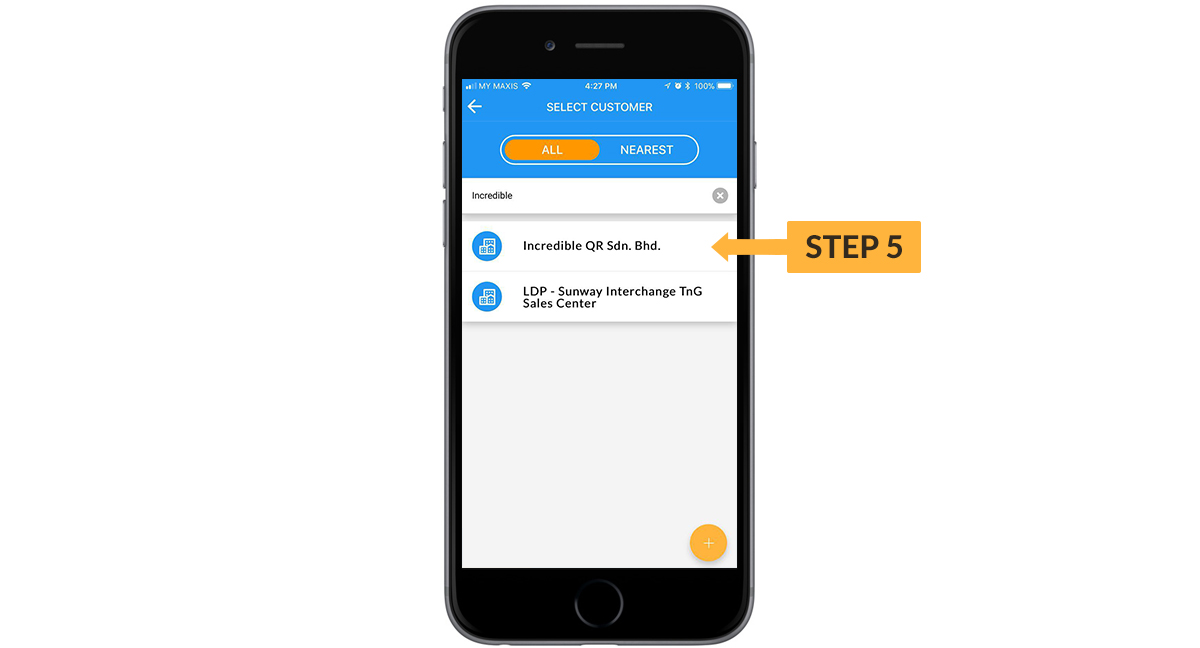
- Select Customer/Location accordingly.
- Wait for system to get your current location.
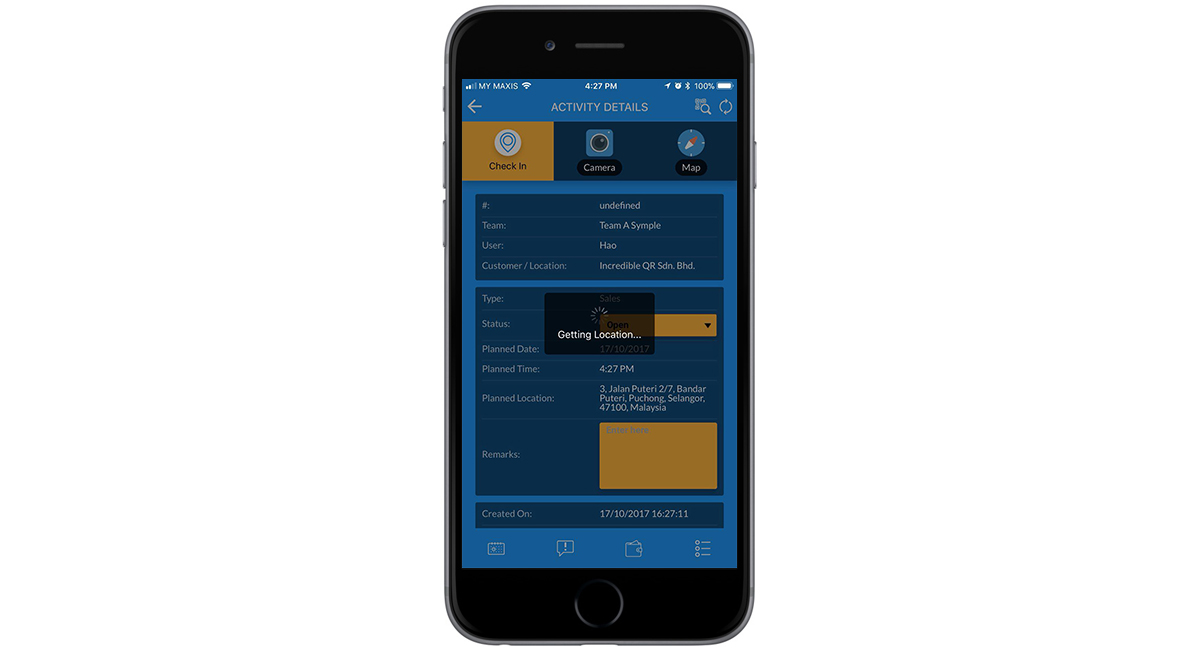
- Quick check-in completed.
Add current location as new customer and check-in
How to add current location as new customer and check-in?
- Make sure Show ‘Add Current Location as a Customer and Check-In’ features is enable.
- Go to Activity page.
- Tap on Add Button located at the bottom of the page.
- Select “Add current location as a Customer and check-in” option.

- Enter Customer/Location name.
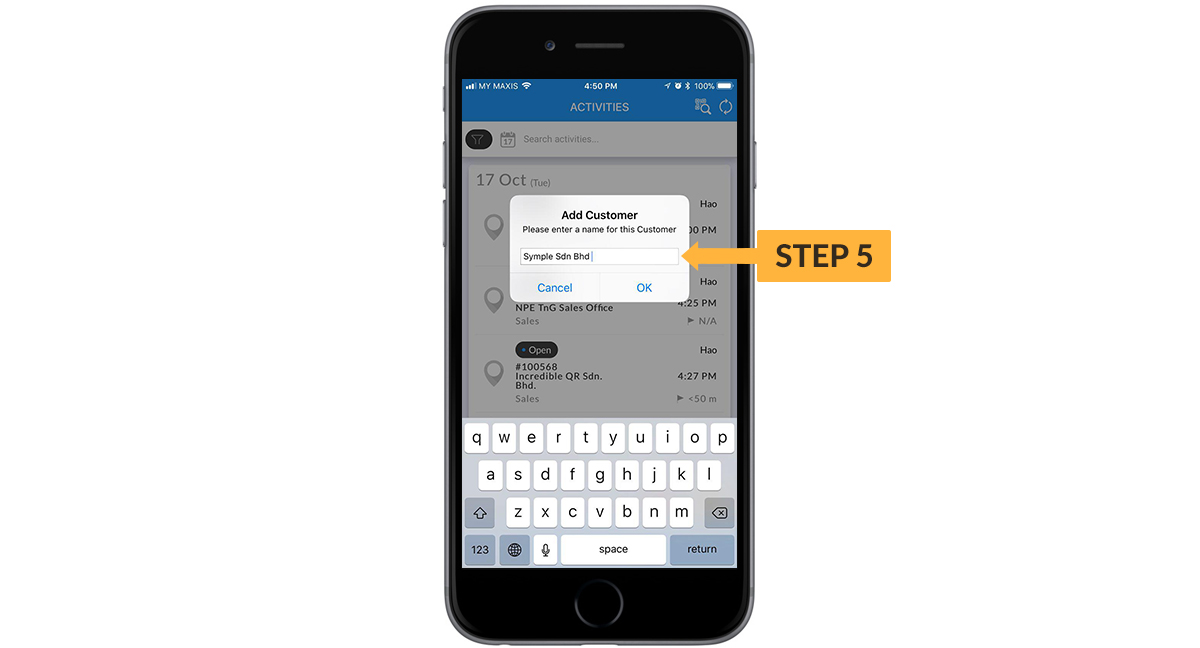
- Wait for system to get your current location.
- Check-in completed.